
Gutters quietly protect your foundation, siding, and landscaping by directing rain away from the house. When they leak, sag, or overflow, water can end up in basements, under slabs, or inside walls. This guide walks homeowners through how to repair common problems on different gutter types and when it is safer to call a pro.
Step 1: Diagnose the Problem
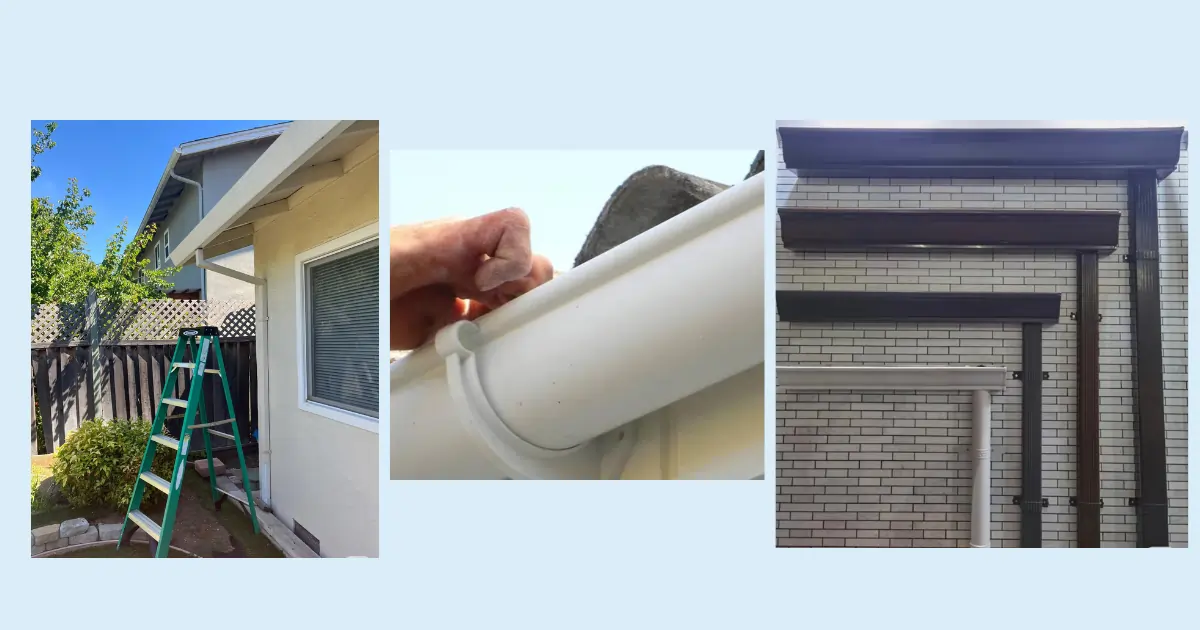
Common issues to look for from a ladder (never lean out; move the ladder instead):
- Leaks at seams, corners, end caps, or around outlets/downspouts
- Small holes or rust spots on metal gutters
- Sagging sections or gutters sloping the wrong way (water sits instead of draining)
- Cracks or UV-brittle sections on vinyl or plastic gutters
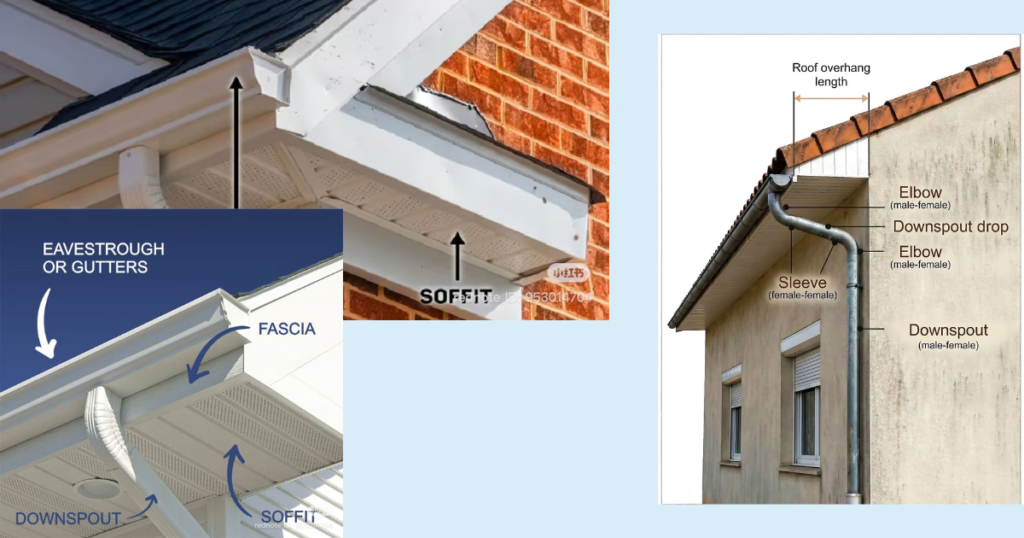
- Rot or staining at the fascia or soffit (sign of long-term leaks)
Once you know where the fault is, you can match it to the right repair method.
What You’ll Need in a Basic Gutter Repair Kit
For most DIY repairs, a small kit covers 80–90% of jobs.
- Safety: extension ladder, ladder stabilizer, work gloves, eye protection
- Cleaning: gutter scoop or small trowel, 5-gallon bucket, garden hose with spray nozzle
- Sealing: exterior gutter sealant or silicone caulk rated for wet/roof use, or butyl/roofing repair tape for patches
- Fastening: new hidden hangers or brackets, exterior-grade screws, downspout straps
- Optional: sheet-metal snips, rivet gun and aluminum rivets for metal gutters
General Repair Steps (All Gutter Types)
These basics apply whether your gutter is aluminum, steel, vinyl, or copper.
- Clean and flush the gutter
- Scoop out leaves and debris, then flush with a hose until water runs clear.
- This reveals where water actually leaks or pools.
- Check the slope
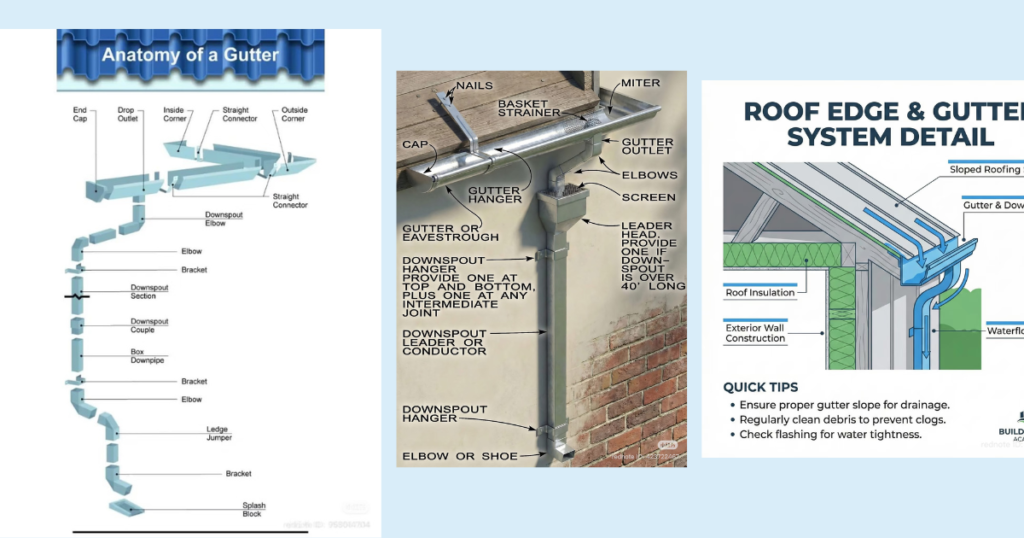
- Gutters should fall about 6 mm per 1.2 m (¼ inch per 4 ft) toward the downspout.
- If water stands in the middle, you may need to rehang that section slightly lower at the outlet.
- Tighten or replace hangers
- Install new brackets so they fasten into rafter tails or solid framing, often about every 40–60 cm (16–24 in).
- Screws should be snug but not crushing the gutter wall.
- Seal small leaks at seams and corners
- Dry the area, then apply a generous bead of gutter sealant inside the joint and tool it smooth to bridge the gap.
- For larger cracks or pinholes, apply sealant or sealant tape over a clean, rust‑free surface.
- Test your repair
- Run water from a hose into the high end and watch the flow at seams, outlets, and downspouts.
- Fix any remaining drips before you pack away the ladder.
Repairing Aluminum and Steel Gutters
These are the most common “K‑style” or half‑round gutters on modern homes.
Typical problems
- Leaks at section seams, mitred corners, or end caps
- Rust spots on older steel systems
- Separated outlet where downspout meets gutter
Materials
- Aluminum or galvanized steel gutters use polyurethane or silicone gutter sealant, aluminum pan‑head screws, and sometimes aluminum rivets.
- For rust holes, use a small metal patch plus sealant or roofing repair tape over cleaned metal.
Steps
- Clean and dry the area thoroughly.
- For seams and corners: apply sealant on the inside of the joint, then add a second bead after assembly to bridge the interior edge and prevent water creeping underneath.
- For small rust holes: wire‑brush or sand off rust, wipe clean, then apply sealant tape or sealant and an aluminum patch over the hole.
- For loose sections: remove old spikes or bent hangers and install new hidden hangers with screws into solid framing, checking slope as you go.
- Reattach downspouts: slide elbows and outlets together, then fasten with pan‑head screws and secure the downspout to the wall with straps.
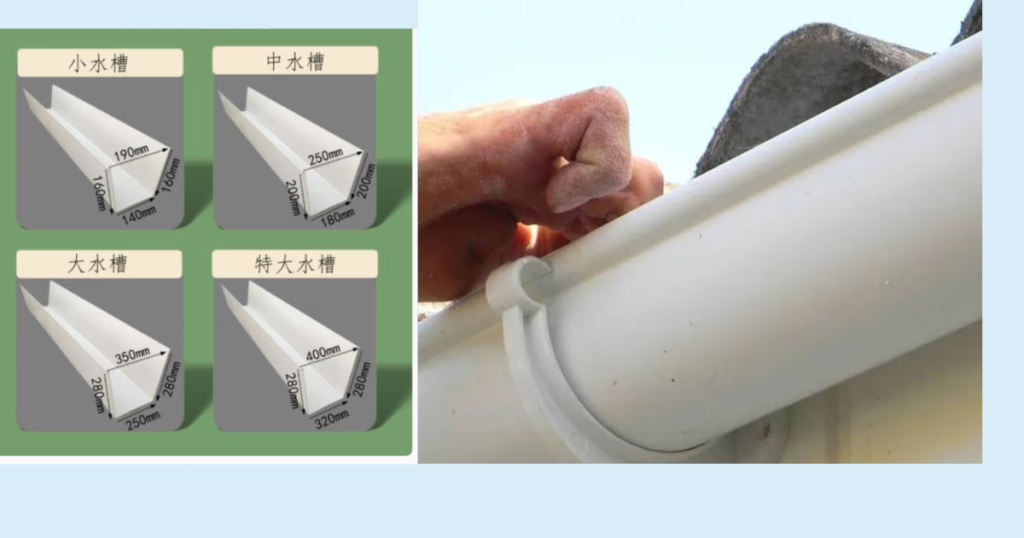
Repairing Vinyl or PVC Gutters
Vinyl gutters are lighter and snap together, but they can crack in cold climates or sag if brackets are too far apart.
Typical problems
- Hairline cracks along the bottom
- Joints popping apart
- UV‑brittle sections that crumble when flexed
Materials
- Exterior‑grade PVC gutter sealant or multi‑surface sealant
- Replacement snap‑together connectors and hangers compatible with your brand
Steps
- Support and clean the section. Vinyl can deform easily, so support it well when working.
- Repair small cracks: dry the area and apply sealant along and slightly beyond the crack inside the gutter; reinforce from the outside with sealant tape if needed.
- Reseat loose joints: fully disassemble the joint, clean away dirt or old sealant, then snap the pieces back together firmly and seal the inside of the joint.
- Replace badly damaged pieces: if the vinyl is chalky or brittle, it is usually better to swap in a new length than to chase multiple cracks.
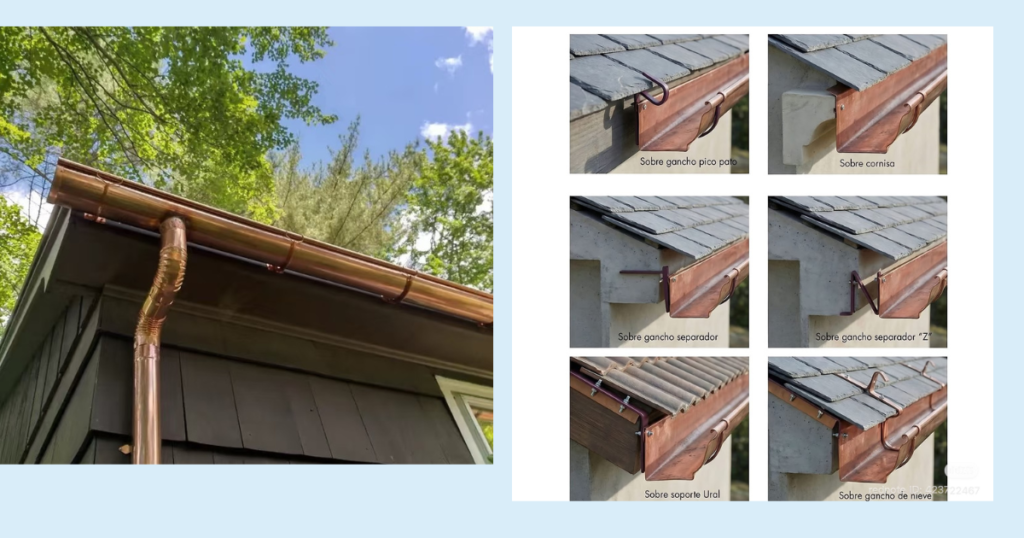
Repairing Copper Gutters
Copper gutters are durable and often installed for aesthetics; they are usually soldered rather than caulked.
Typical problems
- Leaks at soldered seams
- Loose hangers or decorative brackets
- Patina; often aesthetic only, not a defect
Materials
- Copper-compatible solder and flux, propane torch (or hire a pro)
- Alternatively, high‑end metal roof sealant for temporary repairs
Steps
- Inspect seams and hangers: look for gaps or hairline cracks along soldered joints.
- Short‑term DIY fix: gently clean and dry the leaking area, then apply a bead of compatible sealant inside the gutter over the crack.
- Long‑term fix: a professional will resolder the joint so it becomes essentially a single piece of metal again.
For copper, many homeowners choose professional repair because poor soldering can damage the gutter or void warranties.
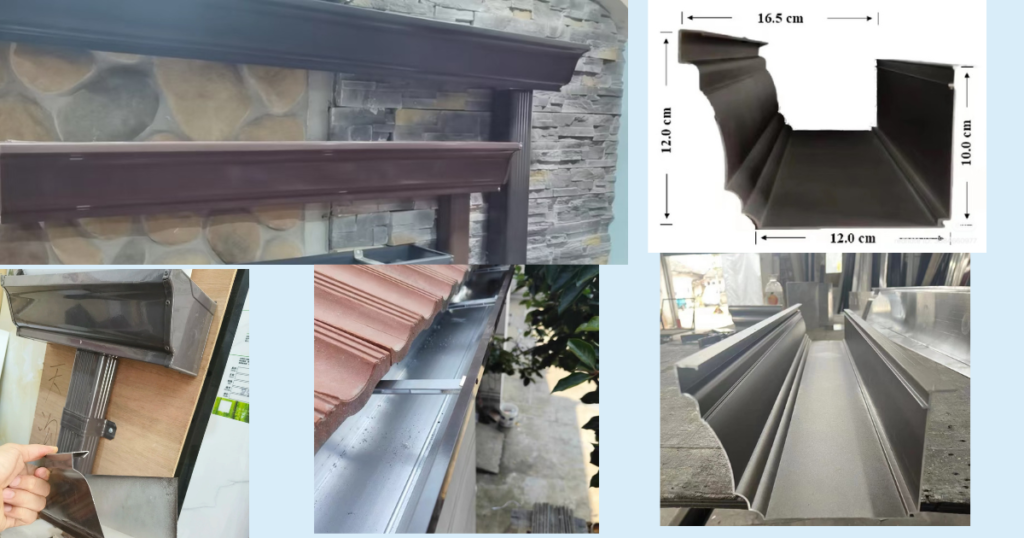
Repairing Built‑In / Integral Gutters
Integral gutters are formed into the roof edge, lined with roofing membrane or metal, and can hold a lot of water—but leaks can damage rafters, fascia, and sheathing if ignored.
Typical problems
- Deteriorated liner (rusted metal, cracked bitumen, or aged single‑ply membrane)
- Persistent leaks into the soffit or interior walls
Materials
- Single‑ply roofing membrane or liquid-applied roofing product approved for gutters
- Compatible primer and flashing accessories
- Roofing nails or fasteners, plus sealant specified for the membrane
Steps (conceptual overview for homeowners)
- Expose and inspect the liner: clear debris and check the status of the current lining. If it is rusted through or cracking, spot repairs rarely last.
- Strip loose or failed sections: cut back to sound material, carefully avoiding damage to sheathing or framing.
- Install a new liner: lay a new single‑ply membrane or similar roofing material in the gutter trough, turning it up the sides and under the shingles as shown in the diagram, and fasten/heat‑weld per manufacturer instructions.
- Tie into roof and wall flashings: ensure the liner integrates with roof underlay and wall flashings so water cannot get behind it.
Because these gutters are part of the roof structure, most homeowners should treat this as at least a “consult a roofer” job rather than a weekend DIY.
When to Repair vs Replace
- Repair is usually enough for: a few leaks at seams, one or two rust spots, loose hangers, or a single cracked vinyl section.
- Consider full replacement if: large portions are rusted through, many joints leak, slope is wrong along the entire run, fascia is rotten, or the built‑in liner is failing along most of its length.
Safety and Maintenance Tips
- Always use a stable ladder; a ladder stabilizer helps keep you off fragile gutters and prevents sideways slip.
- Avoid working in storms, on icy surfaces, or when wind is strong.
- Clean gutters at least twice a year and consider gutter guards to reduce blockages and future repairs.