
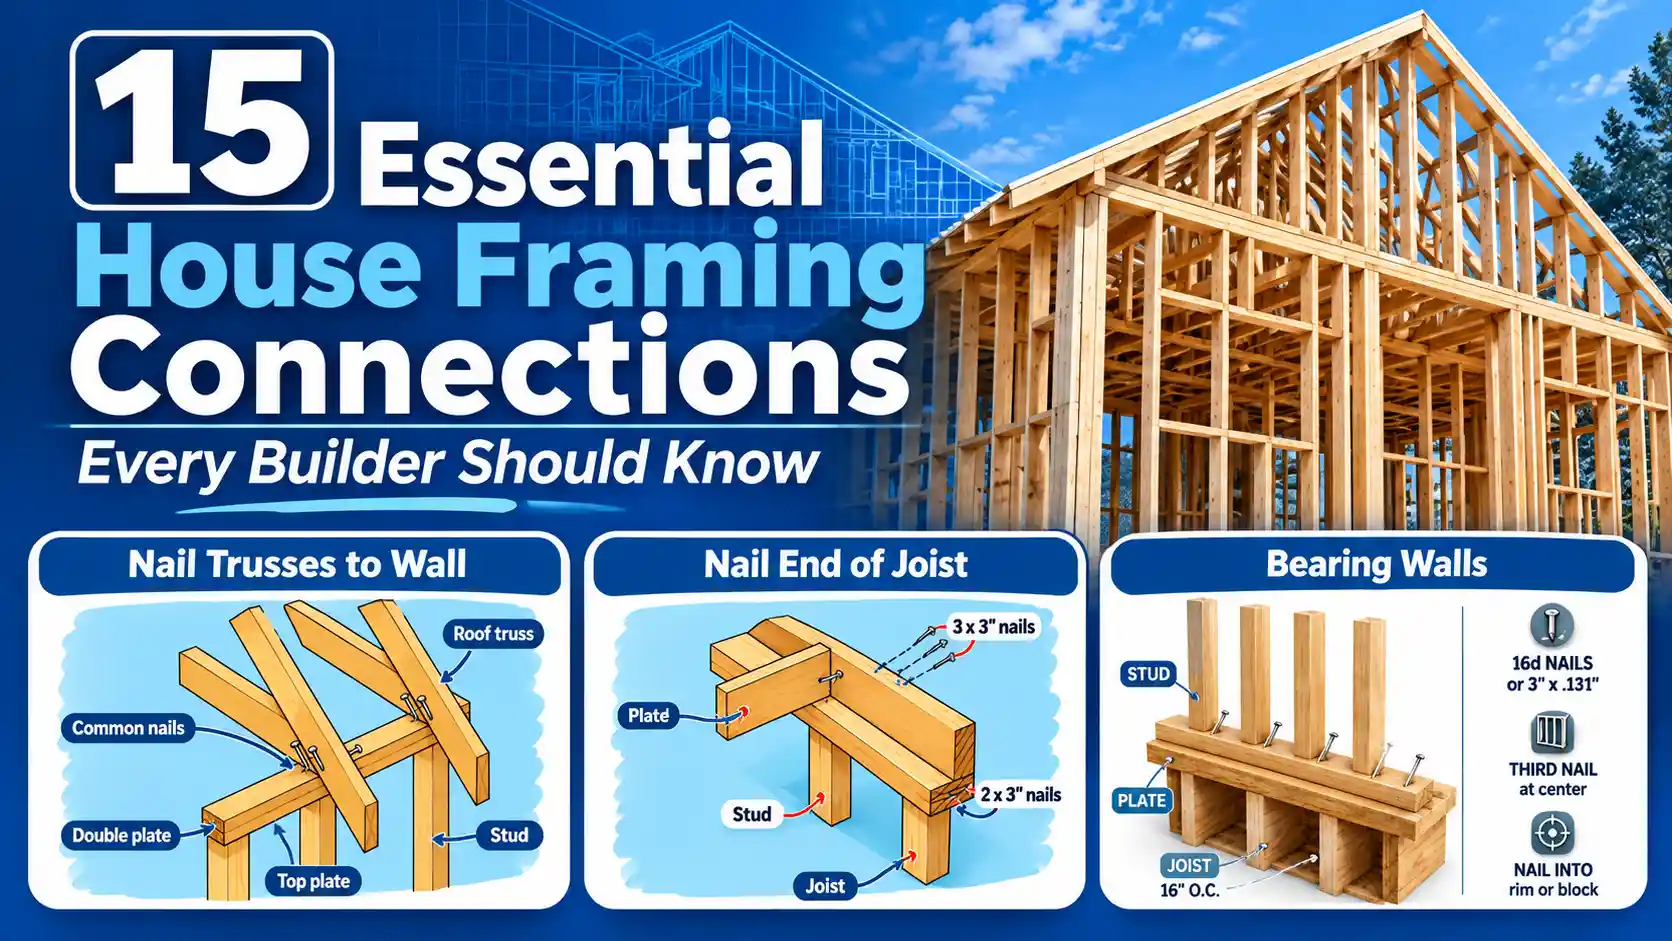
Are you wondering how the timber house framing is built as house owners, DIY enthusiasts or home renovators. Framing houses involves more than putting studs, joists and rafters together. The connections between those members are what make the framing act as one structural system. A connection transfers forces from one member to another and helps maintain the continuity of the frame.
Important: The nail sizes and patterns below are only for educational purposes.. Actual construction must follow the project drawings, applicable building codes, connector manufacturers’ requirements and local practice. The connections mentioned also are for simple timber framing that are not exposed for strong winds and seismic actions. Always the proper structural design is recommended that complies with the local regulations.
1. Top Plate-to-Stud Connection
The top plate ties the vertical wall studs together at the top of the wall. A reliable connection between the plate and studs is essential for keeping the wall assembly together. Two 16d common nails are used in the connection.
.
Why it matters
This connection is repeated throughout a framed wall, so a mistake at individual studs can be multiplied across the entire wall.
2. Bottom Plate-to-Stud Connection
The bottom plate, or sole plate, forms the base of the wall frame. Each stud needs to be properly connected to it. Two 16d common nails are used for the connection.
Why it matters
The bottom of the wall transfers forces into the floor or supporting structure, making this one of the fundamental connections in wall framing.
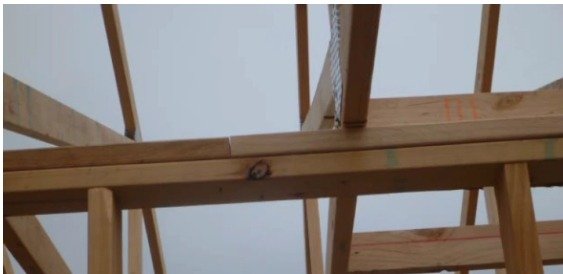
3. Double-Plate-to-Top-Plate Connection
Where a second plate is installed, the two plates need to work together rather than simply sitting one on top of the other. 16d common nails at 12” O.C stagger nails that are doubled with distance 16” O.C at studs for avoiding congestion for pipes and wires. For splices use eight 16d common nails on each end of the side of the splice.
Why it matters
A properly connected double plate helps tie the wall together and provides a continuous bearing and connection surface for framing above.
The double top plate helps transfer forces down through the frame. When a double top plate is used, the end joints (laps) are staggered. A single top plate may be used only under specific code conditions (with proper metal ties at joints and framing aligned over the studs).
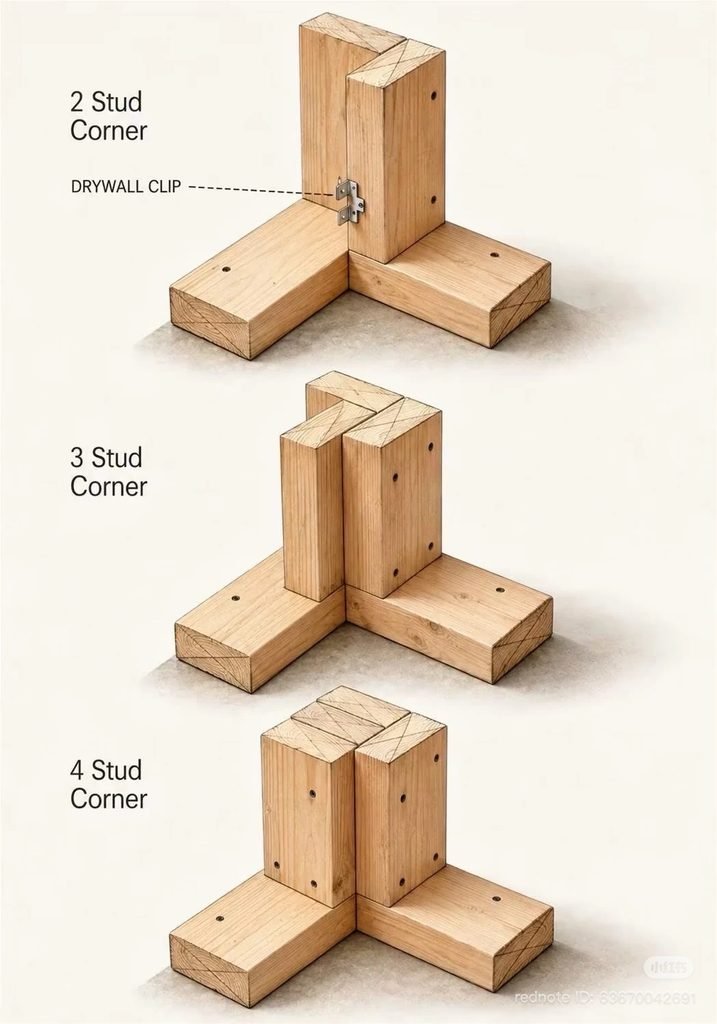
4. Corner-to-Corner Wall Connection
Corners are one of the most important places where separate wall sections become one structure. The connection at the corner needs to sufficiently transfer the forces across and the arrangement is designed for this purpose. However, the corner connections also allow applying insulation adequately. 16d common nails staggered at 16” O.C are used.
Why it matters
A poorly connected corner can create problems for:
- wall alignment
- Insulation installation
- Sheathing application
- interior finishes
- structural continuity
- transferring forces between wall sections
5. Wall-to-Wall / Double-Stud Connection
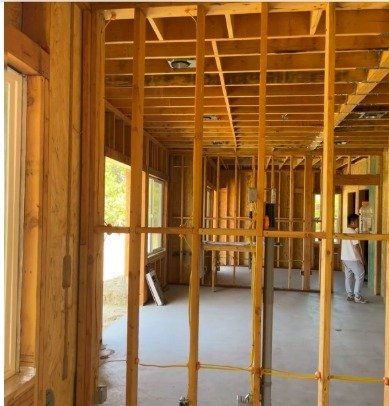
Walls frequently meet at intersections, and some locations require double studs.16d common nails with stagger at 16” O.C are used.
Why it matters
The connection joins the wall assemblies and creates a continuous structural and fastening path.
It can also be important for providing proper support where framing members or sheathing meet.
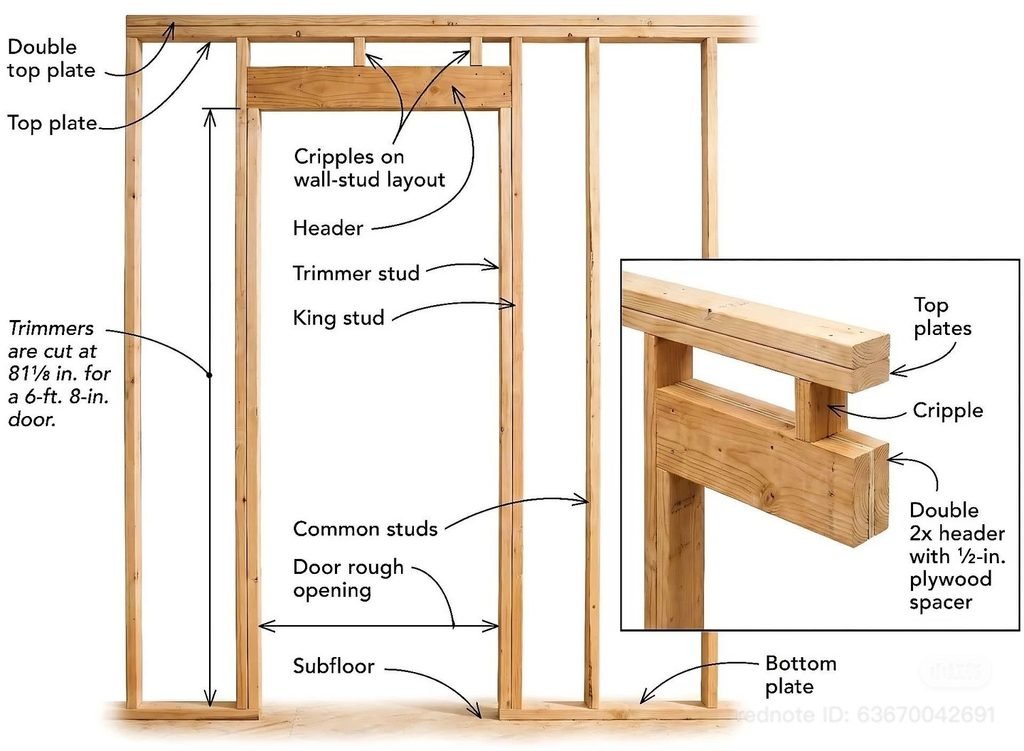
6. Trimmer/Jamb Stud-to-Stud Connection
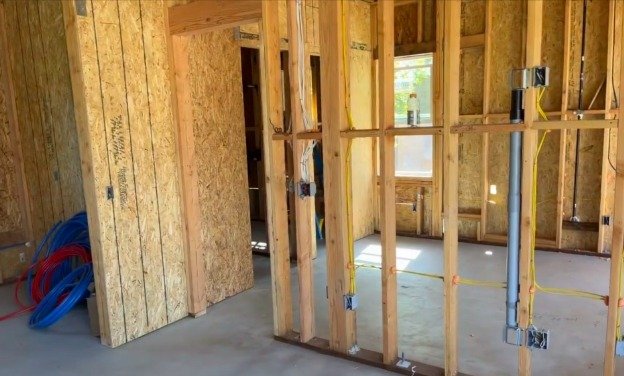
Door and window openings interrupt the normal pattern of wall studs. The trimmer—or jack stud—provides support around the opening.16d common nails with stagger at 16” O.C are used.
Why it matters
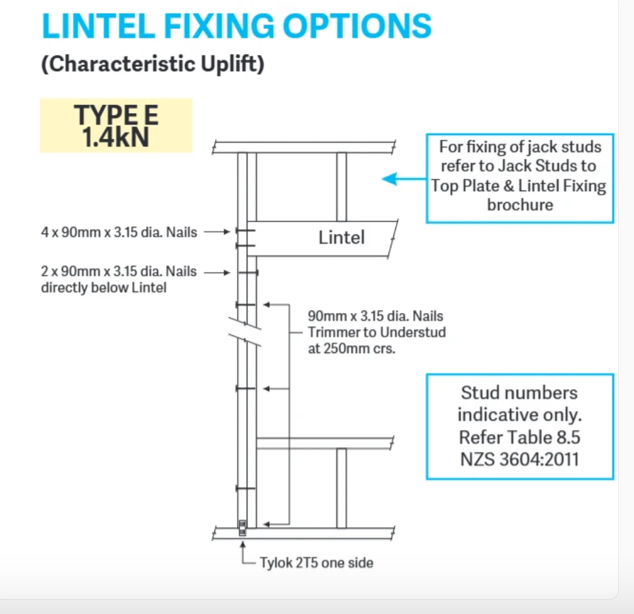
The connection helps the framing around an opening act together and provides support for the header/lintel. It transfers the loads like snow load,wind loads from the roof to the foundation.
The structural load path for wind load is roof uplift force to stud to lintel fixing nails,stud bottom fixing, bottom plate to foundation.
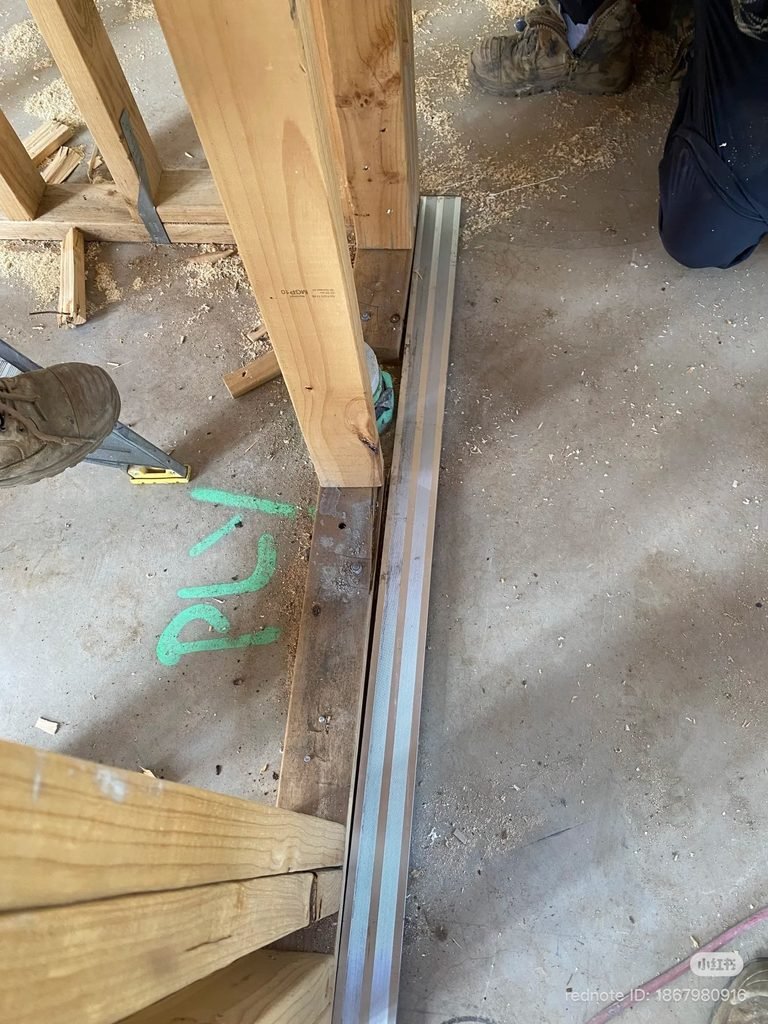
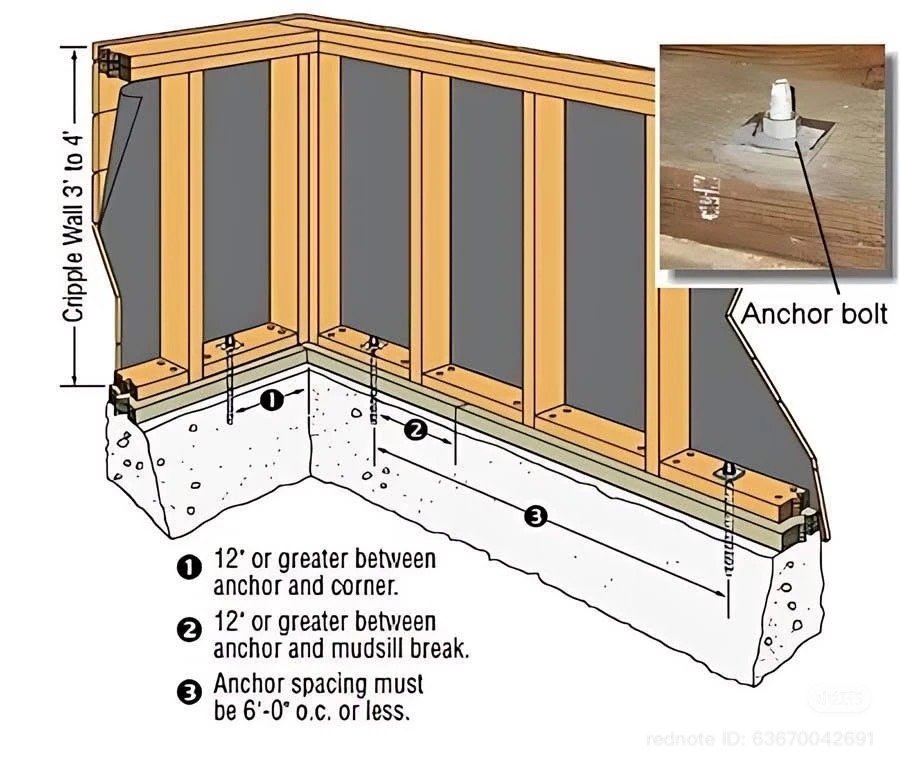
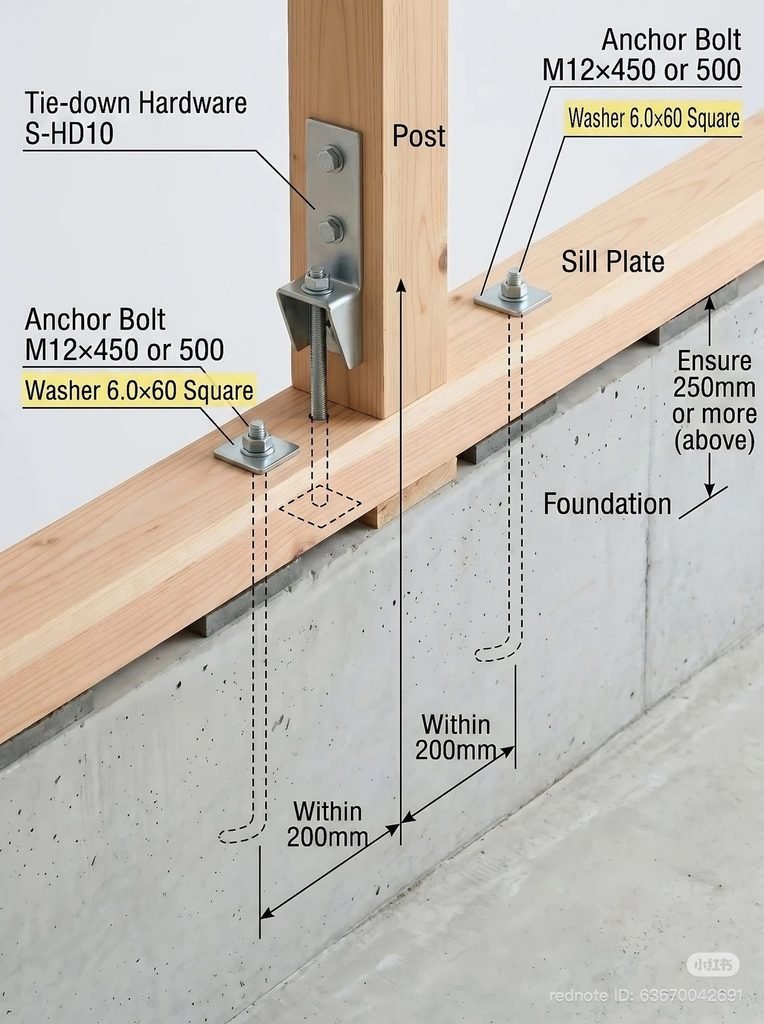
7. Bottom Plate-to-Concrete Connection
When a framed wall sits on concrete, the bottom plate requires a connection to the concrete substrate. The connection with concrete also is done using J bolts and Simpson products that fix the plate to concrete by being embedded or being attached to embedding.
Bottom plates can be fixed to concrete using concrete nails, J-bolts,Anchor bolts or other special connections such as Simpsons connections.
If Anchor nail is used 2.5” concrete nail at 16” O.C or at every stud can be used for Bearing walls and 32” O.C or at every stud for non bearing walls. If other connectors like J bolts are used , concrete nails are only needed to straighten the plates between the anchor bolts or fix the ends.
8. Bearing Wall-to-Floor Connection — Perpendicular Joists
When a bearing wall sits perpendicular to floor joists, the connection needs to transfer the wall load into the floor framing joist and block for bearing walls.Two 16d common nails one into joints and one into blocks are used.
Why it matters
This is a classic example of why the type of connection depends on the directions of the joists. This connection transfers the loads from the walls to the floor joists which are finally transferred to the foundations.
9. Bearing Wall-to-Floor Connection — Parallel Joists
A wall running parallel to the floor joists presents a different framing condition. The forces are transferred to each parallel and perpendicular joist. Two 16d common nails are used, one for each perpendicular and parallel joist.
Why it matters
The location of the wall is parallel relative to the joists . It also transfers the wall load to the floor joists and which is carried to the foundation finally.
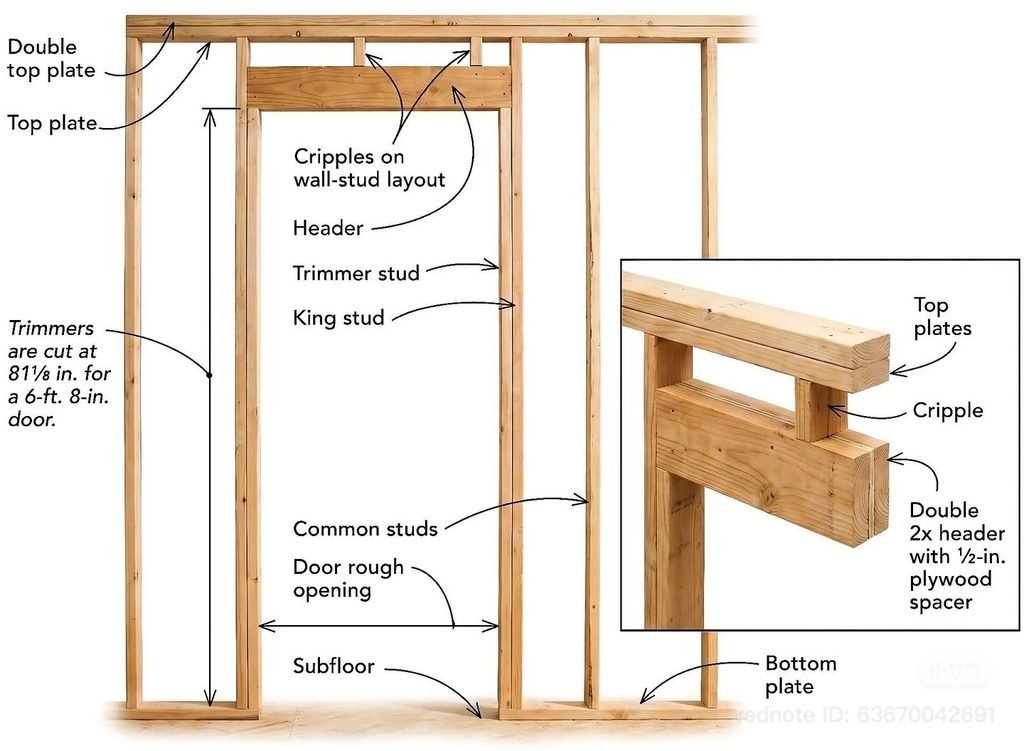
10. Header-to-Stud Connection
Headers transfer loads around door and window openings. The header needs to connect properly to the king and trimmer studs. For 4×8 or 6×8 headers Four 16d common nails are used. For 4×10 or 6×10 header, Five 16d nails are used.
Why it matters
The opening interrupts the normal load path through the wall. The header and supporting studs provide the framing arrangement that carries the load around the opening.
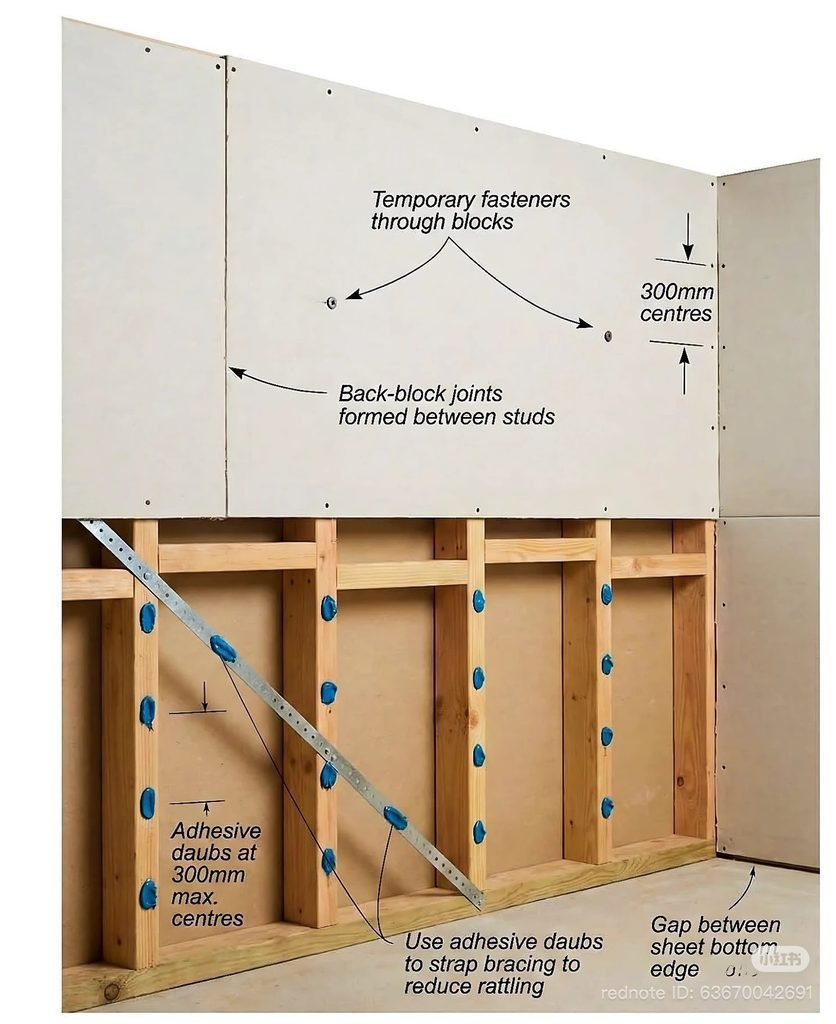
11. Let-In Brace-to-Stud Connection
Let-in bracing is used to help prevent racking of the wall. Two 8d common nails are used at each stud.
Why it matters
A rectangular wall frame can deform into a parallelogram under lateral movement. Diagonal bracing helps resist that racking action.
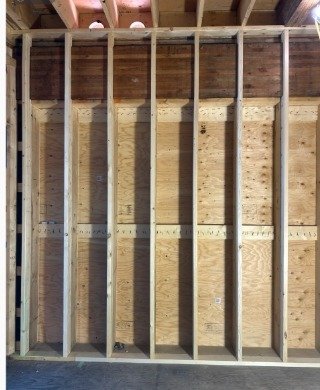
12. Floor Joist-to-Wall Connection
Floor joists need a secure connection to their supporting wall or plate. This connection fixes the floor and rim joist to wall plates. Three 16d common nails are used for fixing the rim joist and Three 8d nails are used to fix the floor joist, two toe nails on one side and one on the other.
Why it matters
The end connection is part of the load-transfer path from the floor system into the supporting wall.
13. Rim Joist-to-Floor Framing Connection
The rim joist does more than close the edge of the floor. The rim joist provides a nailing surface and acts as a structural component between the studs while helping prevent lateral rotation of the joists. 8d nails at 4” O.C are used.Three 10d common nails with toenailing two on one side and one on the other side are used.
Why it matters
It is a good example of a framing member having more than one function.
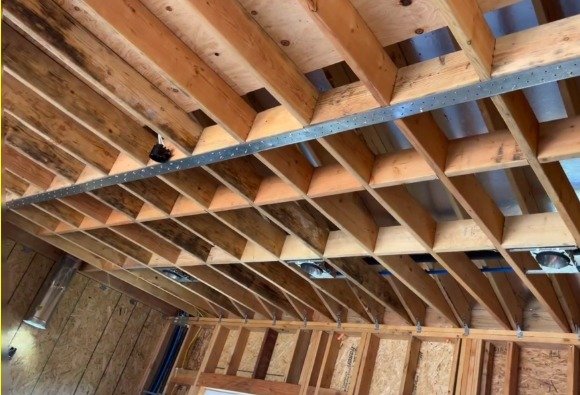
14. Rafter-to-Wall Connections
Roof framing contains several critical connections one of these is rafters. Rafters transmit the loads to the wall and complete the load transfer path to the foundation. Normally, three 10d common nails with toenailing two on one side and one on the other side are used.
Why it matters
The roof is not an isolated structure. Forces must move from the roof framing into the walls and then downward through the building.
A rafter-to-wall connection is particularly important because it can be involved in gravity, lateral and wind-uplift load transfer. (Architecture Courses)
15. Roof Truss-to-Wall Connection
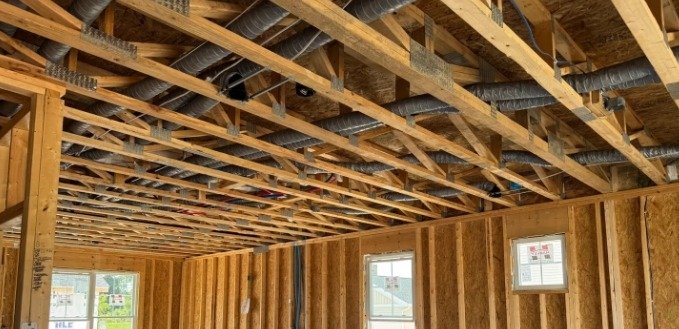
Prefabricated roof trusses require their own connection detail. installing roof trusses may require equipment such as a crane or boom truck. In installing trusses, three 10d common nails with toenailing two on one side and one on the other side are used.
Why it matters
The connection must transfer the forces from the roof truss into the wall while satisfying the requirements of the project.
Roof-to-wall connections form part of the continuous structural load path, particularly for wind uplift.
N.B. This connections show nailing but screwing also is alternatively used. Screwing has benefits such as it can be easily removed if necessary.
The 15 Connections at a Glance
| # | Type of Connection | Where it connects | |
| 1 | Top plate → studs | Stud/top-plate detail | |
| 2 | Bottom plate → studs | Wall-base detail | |
| 3 | Double plate → top plate | Double-plate connection | |
| 4 | Wall corner | 3D corner detail | |
| 5 | Wall-to-wall / double studs | Wall intersection | |
| 6 | Trimmer → stud | Door/window opening | |
| 7 | Bottom plate → concrete | Plate/slab section | |
| 8 | Bearing wall → floor, perpendicular | Wall/joist section | |
| 9 | Bearing wall → floor, parallel | Parallel wall/joist section | |
| 10 | Header → studs | Header/opening detail | |
| 11 | Let-in brace → studs | Diagonal bracing | |
| 12 | Joist end → wall | Floor edge | |
| 13 | Rim joist → floor framing | Rim/joist detail | |
| 14 | Rafter → ridge/wall | Roof connection | |
| 15 | Truss → wall | Truss bearing detail |
There are also additional connections—including sheathing, built-up beams, blocking, lapped joists, drywall backing and fascia—so these 15 are best treated as main connections,