
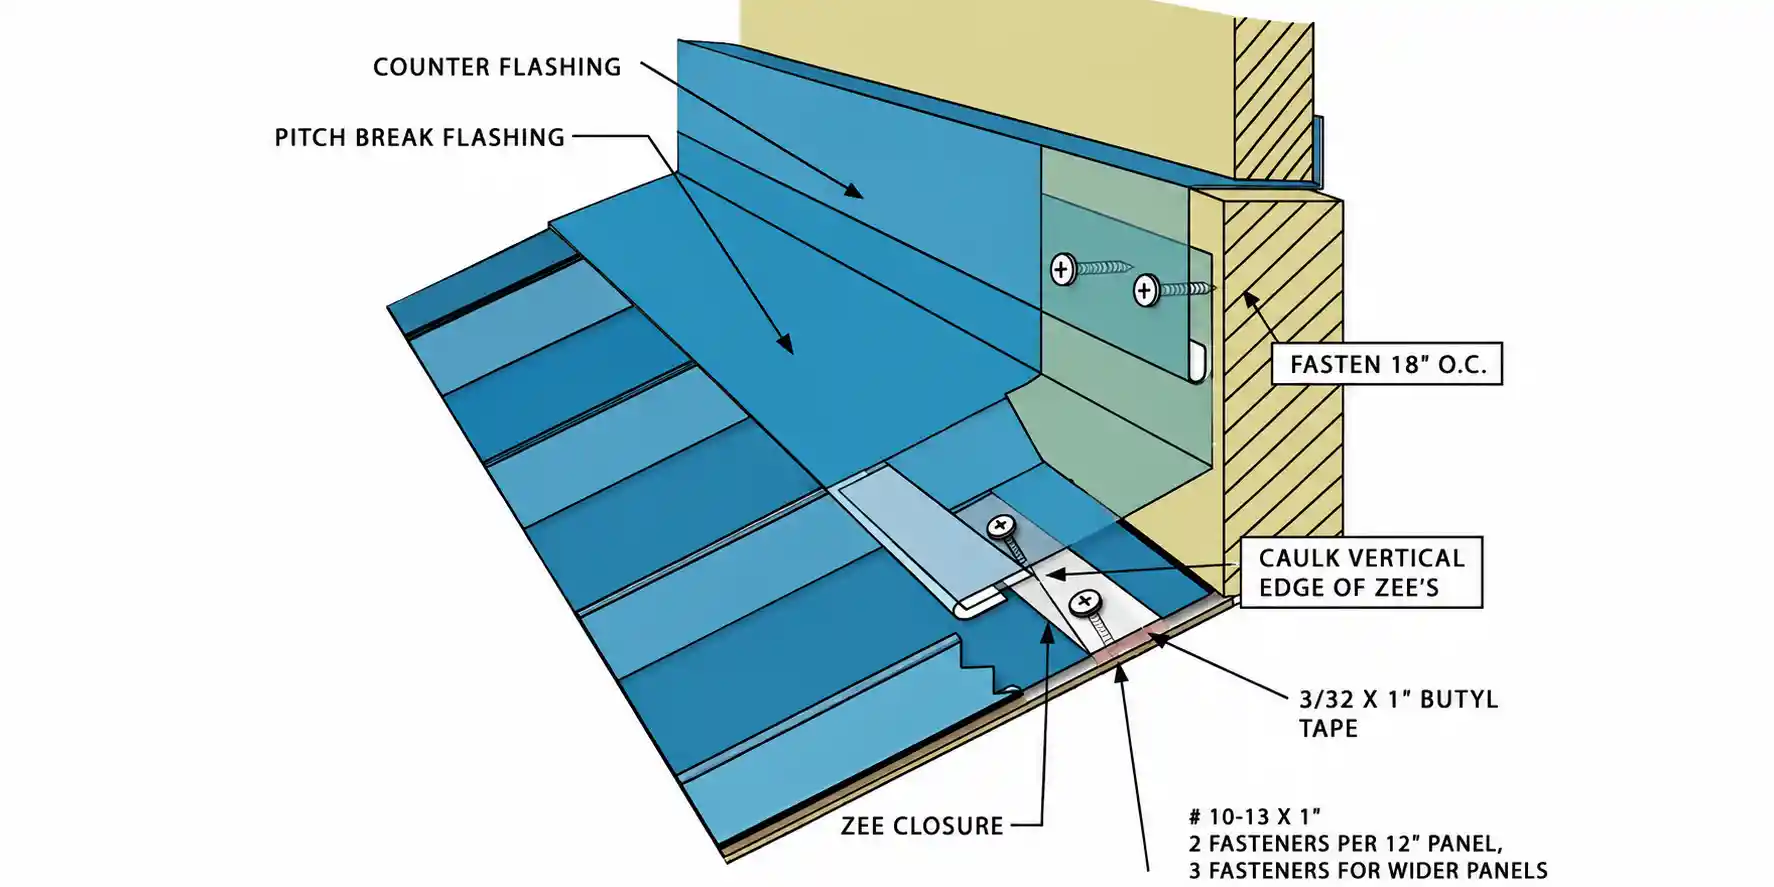
Corrugated polycarbonate patio and lean-to roofs are one of the most common DIY additions to a house — and the point where they meet an existing brick or masonry wall is also where most of them eventually leak.
Unlike a wood-framed wall, brick doesn’t have plywood sheathing or house wrap behind it, so the flashing detail has to do all the work of keeping water out of the mortar joints and structure behind it.
Here’s what a properly built head flashing detail looks like.
Why Masonry Walls Are a Different Challenge
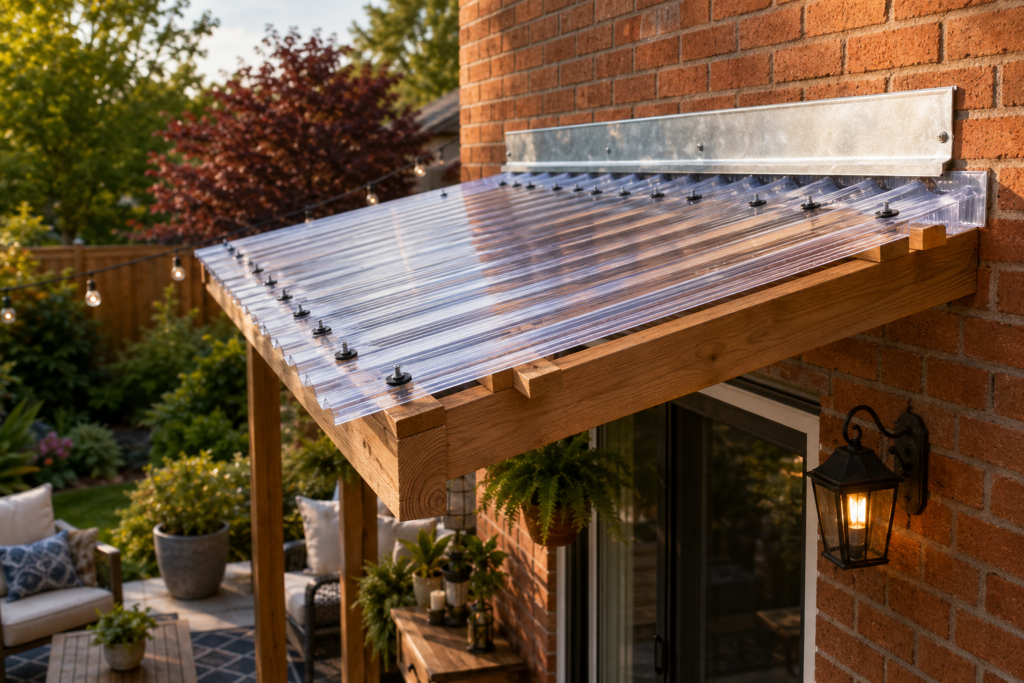
Unlike stud walls, masonry walls lack an internal weather-resistant barrier to catch and redirect stray water as shown in the two configurations of application.
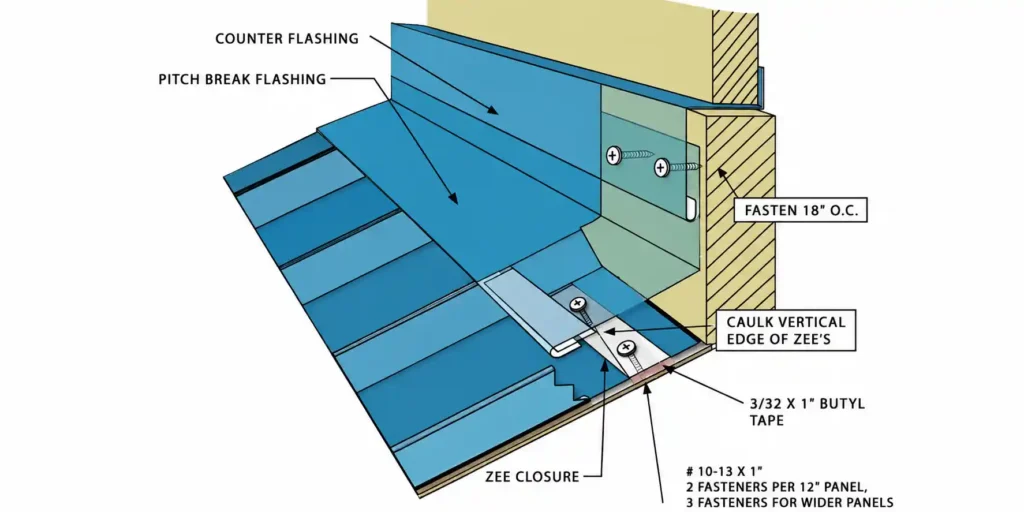
This means the flashing must serve as your primary, standalone line of defense. To prevent water from seeping behind the roof panels or tracking down into the brickwork, the flashing must physically overlap the wall. It relies entirely on its own shape, precise coverage, and a tight sealant joint to keep water out.
The Two Configurations of Wall flashing: Stud Walls vs. Masonry Walls
- The Shielded System (Stud Walls):
- How it works: The flashing tucks safely behind the weather-resistant barrier (house wrap).
- Water strategy: It relies on a multi-layered defense. If water gets past the siding, the internal barrier catches it and drains it away.
- Installation goal: Maintain the correct layering order so gravity naturally sheds water outward.
- The Exposed Barrier (Masonry Walls):
- How it works: The flashing mounts directly onto the bare exterior brick or concrete.
- Water strategy: It lacks an internal barrier, meaning the flashing is your only line of defense.
- Installation goal: Create a flawless standalone seal using precise geometry, a physical overlap, and heavy sealant to stop water from tracking downward.
The Components, From the Wall Down to the Rafters
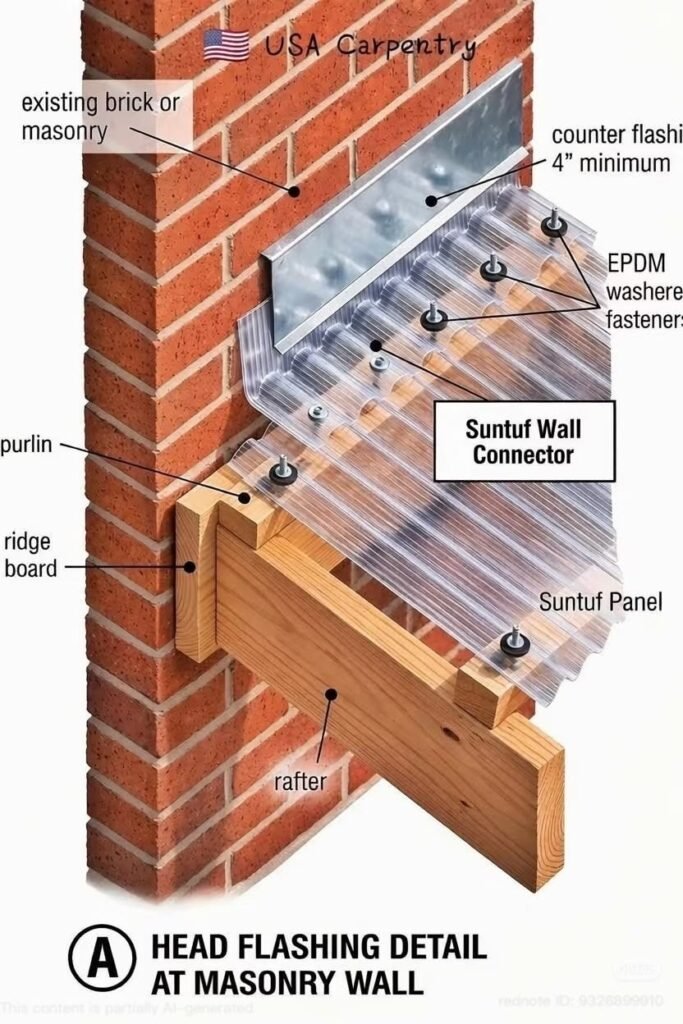
Existing brick or masonry The wall the roof structure is attaching into. Fasteners into brick typically need masonry anchors, and the flashing above needs to sit tight against the brick face so water can’t get behind it and into the mortar joints.
Counter-flashing (4″ minimum) The bent metal piece that runs along the top of the roof panels and up the wall face. The “4 inch minimum” callout matters here — that’s the minimum vertical coverage up the wall needed to keep wind-driven rain from being pushed up and over the top edge of the flashing. Skimping on this dimension is one of the most common reasons these details fail in heavy rain or wind.
Suntuf Wall Connector A manufacturer-specific closure piece (in this case for Suntuf brand polycarbonate panels) that matches the corrugation profile of the panel and gives the counter-flashing a clean, sealed transition to fasten into. Using the profile-matched connector instead of improvising with flat flashing is what keeps each corrugation channel sealed individually, rather than leaving gaps at every ridge of the panel.
EPDM washer fasteners Screws with a rubber (EPDM) washer bonded under the head. These compress down over the panel to seal the fastener penetration itself — every screw hole through a polycarbonate panel is a potential leak point, and the washer is what closes it. Using plain washers or standard screws here is a common shortcut that leads to slow leaks at every fastener over time.
Suntuf panel The corrugated polycarbonate roofing itself, sitting on top of the framing and under the counter-flashing/wall connector at the top edge.
Purlin The horizontal support running across the top of the rafters that the panels are actually fastened down into, perpendicular to the roof slope.
Ridge board / rafter The structural framing that carries the load down and, in a patio application like this, attaches back to the house framing or ledger.
How to install Top Wall Flashing – Polycarbonate Roof| Snapa
Steps to Seal a Lean-To Roof Against a Wall
It is the most important since most leaks happen on wall connections of a lean-to roof.
Follow this sealing sequence:
Step 1 — Fix the sheets and glazing pieces first
This will determine the correct height for flashing.
Step 2 — Installing wall flashing
The material used is either aluminium, steel or lead-replacement flashing.
Step 3 — Sealing the flashing where it connects to the wall
Use appropriate roofing sealant for maximum flexibility and UV resistance. The sealant should be low modulus and UV resistant. The flashing and the roof material move from each other due to different expansion and contraction of the materials.Thus low modulus sealant serves as flexible seal and prevents water entry to inside of the wall.
It is worth remembering not to seal directly between the flashing and the polycarbonate surface.
So what to do? The flashing must be installed over to just float above the sheet as step 4.
Step 4 — Ensure flashing overlaps the top of the sheets
The flashing must hover just above the roofing sheets, not clamp down on them. Polycarbonate expands in the heat and shrinks in the cold. If the flashing presses too tightly against the plastic, this natural movement will tear the fixtures loose and cause leaks.
Installing patio roofs on walls pose a serious risk of leakage. This makes it very important to take all precautions and install the elements carefully to avoid problems that arise due to leakage. The types of walls determine what solution is needed, stud walls and masonry walls require different solutions due to the nature of the details of the walls.